
Creating and Sending Invoices from iRestore to QuickBooks
Invoicing in iRestore is done out of the Financial Detail
screen. The Financial Detail screen can be found on the Billing Tab of the Job
Detail.
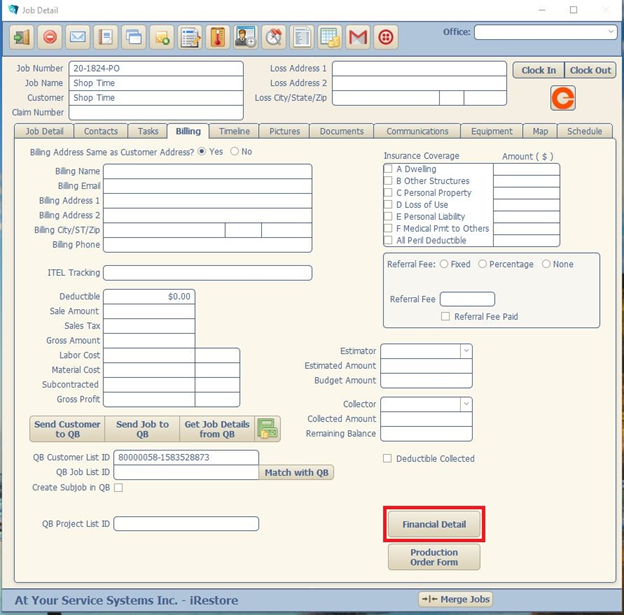
The Financial Detail Screen allows for the creation of
Estimates (Where Invoicing will be done from.), Payments, and Reserves.

To open the Invoice Detail Screen, click the button marked
below:
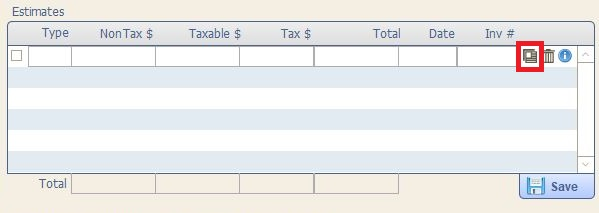
The Invoice Detail breaks down by Line Items, as well as
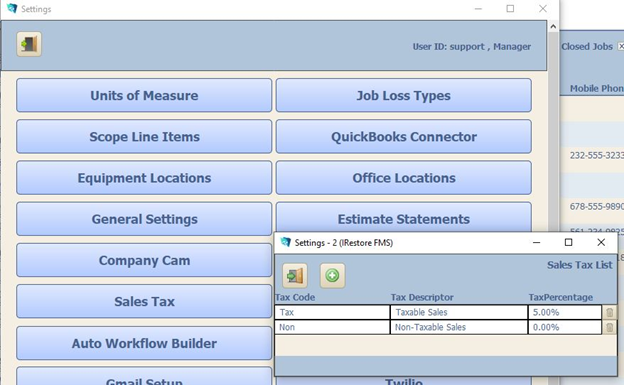
Type and Tax Code. (Tax Codes can be created within the Settings Menu ->
Sales Tax)
You can also add items Manually if you are not using
QuickBooks, but any items manually added will be unable to be sent into
QuickBooks.
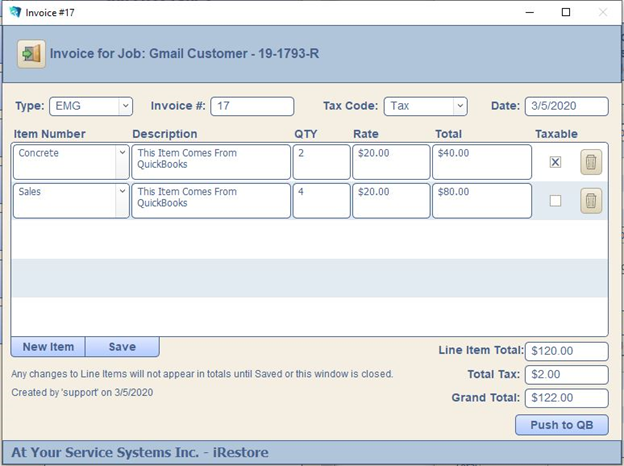
Once your invoice is set up with the correct Line Items and
Amounts, click Push to QB. Your Invoice should then appear under the correct
Job in Quickbooks.